Miniflux 搭建 + RSSHub 使用
其实docker 搭miniflux 很简单,搬迁服务器后记录一下2nd搭,留个记录
Miniflux
创建 miniflux 文件夹
mkdir miniflux
cd miniflux
创建 docker-compose.yml 文件
vim docker-compose.yml
写入以下内容并保存
version: '3.4'
services:
  miniflux:
    image: miniflux/miniflux:latest
    ports:
      - "8080:8080"  #容器外部端口:内部端口
    depends_on:
      - db
    environment:
      - DATABASE_URL=postgres://miniflux:secret@db/miniflux?sslmode=disable
      - RUN_MIGRATIONS=1
      - CREATE_ADMIN=1
      - ADMIN_USERNAME=admin  # 登录Miniflux的用户名,可自定义
      - ADMIN_PASSWORD=password  # 登录Miniflux的密码,可自定义,至少6位
      - "BASE_URL=https://enter.your.url"  # 调整二:输入想用来访问Miniflux的域名
    healthcheck:
      test: ["CMD", "/usr/bin/miniflux", "-healthcheck", "auto"]
  db:
    image: postgres:latest
    environment:
      - POSTGRES_USER=miniflux
      - POSTGRES_PASSWORD=secret
    volumes:
      - miniflux-db:/var/lib/postgresql/data
    healthcheck:
      test: ["CMD", "pg_isready", "-U", "miniflux"]
      interval: 10s
      start_period: 30s
volumes:
  miniflux-db:
启动服务
docker-compose up -d
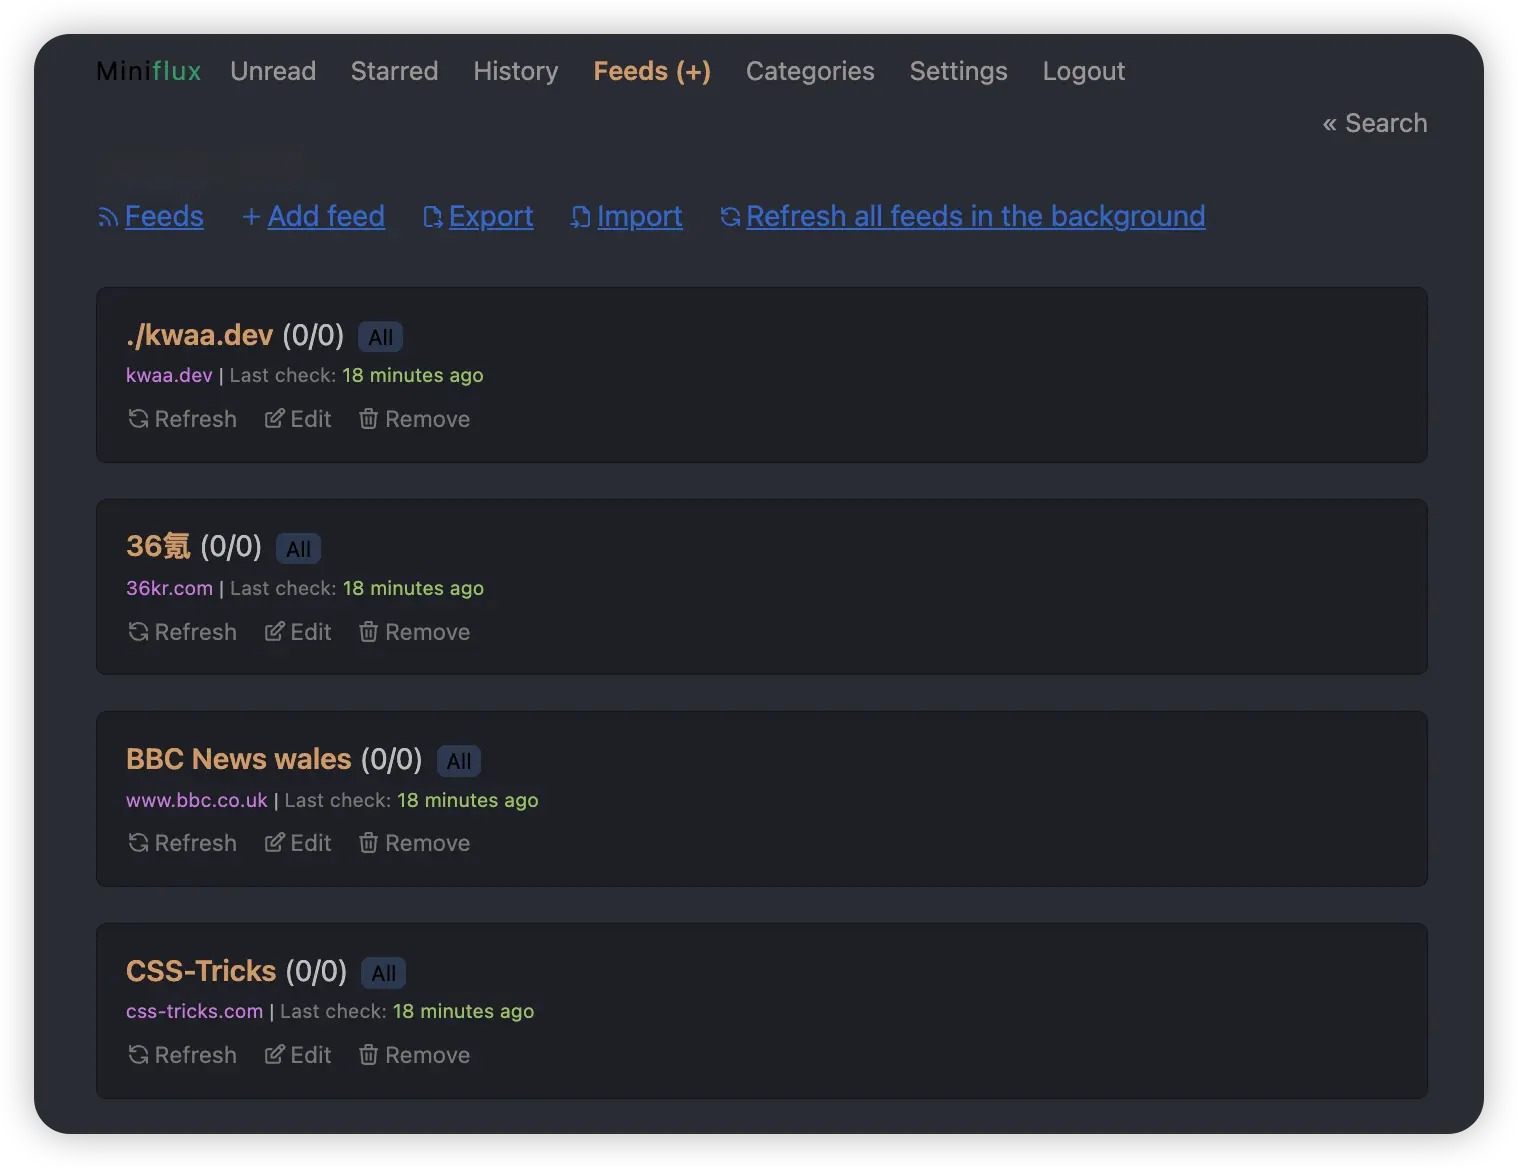
此时访问ip:8080 可以看到登录界面,在settings - Custom CSS 修改主题
:root {
  --font-family: system-ui, -apple-system, "Segoe UI", Roboto, "Helvetica Neue", Arial, "Noto Sans", sans-serif, "Apple Color Emoji", "Segoe UI Emoji", "Segoe UI Symbol", "Noto Color Emoji";
  --body-color: rgba(255, 255, 255, 0.7);
  --body-background: #282c34;
  --header-link-color: #9b9494;
  --header-active-link-color: #d19a66;
  --input-border: 1px solid #2c384e;
  --input-background: #2c384e;
  --input-placeholder-color: #888;
  --input-focus-border-color: #d19a66;
  --input-focus-box-shadow: none;
  --category-background-color: #2c384e;
  --category-border-color: #2c384e;
  --item-border-color: rgba(0, 0, 0, .3);
  --item-padding: 1em;
  --item-title-link-font-weight: 600;
  --item-status-read-title-link-color: rgba(209, 154, 102, 0.5);
  --entry-header-title-link-color: #d19a66;
  --entry-content-code-background: #2c384e;
  --entry-content-code-border-color: #2c384e;
  --entry-content-font-weight: 300;
  --entry-content-font-family: 'Literata', 'Libre Baskerville', Georgia, 'Times New Roman', Times, serif !important;
  --entry-content-quote-font-family: var(--entry-content-font-family)
}

*:focus {
  outline: 0 !important;
}

input[type="search"],
input[type="url"],
input[type="password"],
input[type="text"],
input[type="number"] {
  padding: .25em .5em;
  box-shadow: none;
  border-radius: 6px;
}

.entry header h1 {
    margin: 1em 0 16px;
}

.entry-actions {
    opacity: .5;
}
.entry-meta {
  color: #98be65;
}

.entry-website a {
  color: #c678dd;
}

.entry-date {
  font-size: .75em;
  color: rgba(255, 255, 255, 0.4);
}

.entry-actions li a {
  font-weight: bold;
  color: #9b9494;
}

.entry-actions li a:hover {
  font-weight: bold;
  color: white;
}

.entry header h1 a:hover,
.entry header h1 a:focus {
  color: #d19a66;
  text-decoration: underline;
}
.pagination-top {
    display: none;
}
.entry-content {
  line-height: 2;
  padding-top: 2em;
}

.entry-content p {
  margin-top: 0;
  margin-bottom: 1em;
}

.entry-content a {
  color: #c678dd;
}

.entry-content a:visited {
  color: #dd7890;
}

.entry-content img {
  width: 100%;
  margin: 0 auto;
}

.entry-content figcaption {
  color: #c678dd;
  background-color: rgba(0, 0, 0, .3);
  margin-top: -7px;
  border-radius: 0 0 4px 4px;
  padding: 0.25rem 1rem;
  text-transform: unset;
}

.entry-content pre {
  padding: .5rem 1rem;
  border-radius: 6px;
  margin: 0 0 1em;
}

.entry-content code {
  padding: 3px;
  border-radius: 6px;
}

.item,
.alert {
  border: 1px solid var(--item-border-color);
  margin-bottom: 20px;
  background: rgba(0, 0, 0, .3);
  border-radius: 6px;
}

.item-title a {
  color: #d19a66;
}

.item-meta-info {
    padding-top: 2px;
}

.item-meta-info li a {
  color: #c678dd;
}

.item-meta-info li time {
    color: #98be65;
}
.item-meta-info li span {
    color: #61afef;
}

.entry-content li {
  margin: .75em 0;
}
Nginx
创建 Nginx 配置文件
vim /etc/nginx/sites-available/miniflux.conf
写入以下内容
server {
    listen 80;
    server_name enter.your.url;

    location / {
        proxy_pass http://127.0.0.1:8080;    #8080改为miniflux对外开放的端口,默认为8080
        proxy_redirect off;
        proxy_set_header Host $host;
        proxy_set_header X-Real-IP $remote_addr;
        proxy_set_header X-Forwarded-For $proxy_add_x_forwarded_for;
        proxy_set_header X-Forwarded-Proto $scheme;
    }
}
测试Nginx配置文件有没有问题
[admin@vps] nginx -t
nginx: the configuration file /etc/nginx/nginx.conf syntax is ok
nginx: configuration file /etc/nginx/nginx.conf test is successful
建立软连接
ln -s /etc/nginx/sites-available/miniflux.conf /etc/nginx/sites-enabled/miniflux.conf
运行
nginx -s reload
systemctl start nginx
systemctl enable nginx
安装 certbot
sudo apt install certbot
apt-get install python3-certbot-nginx
输入
certbot
按步骤操作直到
Deploying certificate
Successfully deployed certificate for miniflux.ponderduck.cc to /etc/nginx/sites-enabled/miniflux.conf
Congratulations! You have successfully enabled HTTPS on https://miniflux.XXXX.com
现在可以通过域名访问miniflux了
RSSHub
借助 Vercel 部署 RSSHub,配合插件 RSSHub Radar 可以探测到大部分订阅源,此外补充一些订阅方式:
- 油猴 - RSS+ : Show Site All RSS by Wizos
- FeedX
- https://plink.anyfeeder.com/
- https://rss-bridge.org/bridge01/
- 微信公众号转RSS服务 https://wechat2rss.xlab.app/
效果:
